 how-to
Step by Step Guide to Preventing Salt Corrosion on Siding
Table of Contents
- Signs of Salt Damage on Home Exterior
- How Often to Wash Siding in Coastal Areas
- Best Exterior Cleaners for Salt Air
- Step 1: Prepare the Surface Before Treatment
- Step 2: Rinse and Remove Salt Residue
- Step 3: Apply a Protective Coating or Sealant
- Step 4: Protect Exterior Hardware and Fasteners
- Step 5: Inspect and Maintain Your Siding Year-Round
- Frequently Asked Questions
Last Updated: September 30, 2026
Signs of Salt Damage on Home Exterior
Salt corrosion on siding is the gradual breakdown of exterior surfaces caused by salt particles bonding with moisture and eating into metal, paint, and vinyl. This step by step guide to preventing salt corrosion on siding walks you through what to look for before damage spreads.
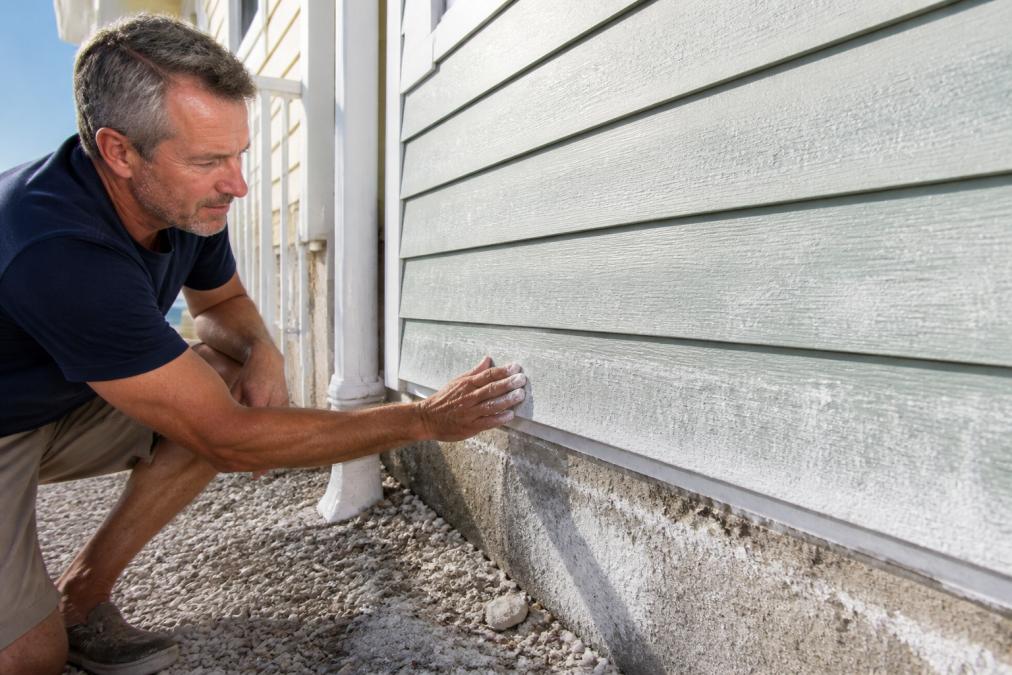
Watch for these early warning signs:
- White, chalky film on siding that returns within days of washing
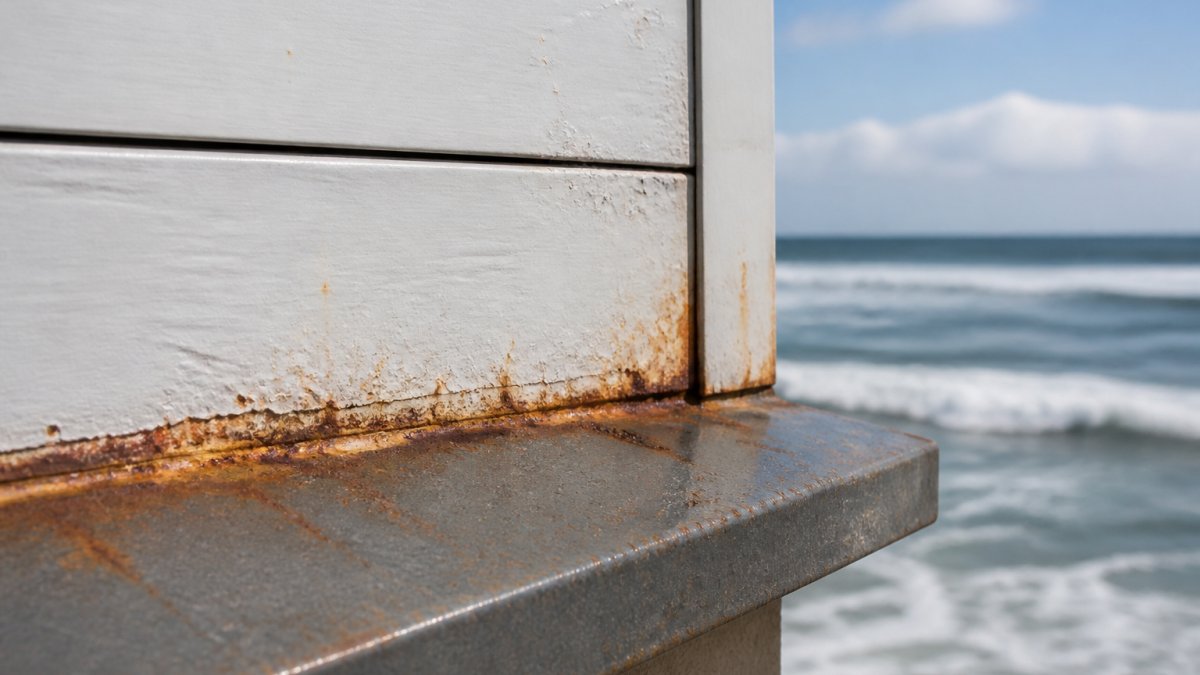
- Rust streaks under nails, hinges, and light fixtures
- Chalking paint that rubs off on your hand
- Pitting or pinholes in metal panels and trim
- Warping or brittleness in vinyl panels
- Chalky white crust along the bottom third of walls, where splash-back hits hardest
What Salt Corrosion Looks Like on Metal and Vinyl
Metal shows corrosion as rust spots and flaking paint, often starting at fasteners. Vinyl shows it as a dull, chalky surface that never comes fully clean. The salt crust itself is white and gritty, pulling moisture against the surface long after the air has dried.
Why Humidity and Salt Spray Accelerate Damage
Salt-laden air carries fine particles that settle on every surface. Humidity holds them in place, and the salt keeps pulling in more moisture overnight. That constant wet-dry cycle drives surface oxidation and atmospheric corrosion, so coastal maintenance needs a tighter schedule than inland maintenance.
How Often to Wash Siding in Coastal Areas
Wash siding every three to four months in coastal areas, and monthly on walls that face the water. The exact interval depends on shoreline distance, wall orientation, and wind-driven spray exposure.
The 5-Mile Rule: A Coast-Proximity Maintenance Calendar
Distance from the water is the best predictor of how fast salt accumulates, so a tiered schedule beats a one-size-fits-all rule. Use these bands as a starting point and adjust after your first full year:
| Distance From Shoreline | Full Wash | Freshwater Rinse | Coating Refresh |
|---|---|---|---|
| 0-1 mile (direct spray zone) | Every 6-8 weeks | Monthly, plus after every storm | Annually |
| 1-3 miles (wind-driven zone) | Every 3-4 months | Every 6-8 weeks | Every 18-24 months |
| 3-5 miles (trace zone) | Twice a year | Quarterly | Every 2-3 years |
| Beyond 5 miles | Once a year | As needed after storms | Every 3-5 years |
A Seasonal Maintenance Calendar for Salt Air Environments
- Early spring: Full wash to strip winter salt and pollen, then inspect for new rust and chalking.
- Late spring: Freshwater rinse after pollen season ends; touch up any fasteners showing rust.
- Mid-summer: Full wash or rinse depending on your tier; this is peak humidity and peak salt spray.
- Early fall: Post-storm check and rinse; wind-driven salt from coastal storms lands heaviest here.
- Late fall: Protective coating refresh before winter, when damp nights hold salt against the surface longest.
- Winter: Monthly freshwater rinse on exposed elevations; avoid washing when temperatures are near or below freezing.
Best Exterior Cleaners for Salt Air
The best exterior cleaners for salt air are simple: fresh water first, mild soap second, and a purpose-made siding cleaner only for stubborn buildup. Harsh cleaners strip the protective finish that keeps salt out, worsening the next round of damage.
A basic cleaning solution that works on most surfaces:
- 1 gallon fresh water
- 1/4 cup mild liquid soap
- A soft-bristle brush or low-pressure sprayer
Environmentally Safe Cleaning Solutions
Skip bleach-heavy mixes near landscaping and storm drains. Mild soap, water, and a soft brush handle most salt residue without harming plants or pets. For tougher buildup, use biodegradable cleaners safe for the surface, and test any new product on a hidden panel first.
Step 1: Prepare the Surface Before Treatment
Surface preparation decides whether your protective coating lasts or fails. A coating applied over salt residue, chalk, or dirt will peel within months, so this step is not optional.
Here is how to prep:
- Clear the area. Move furniture, grills, and planters away from the wall.
- Cover landscaping. Drape plants and outdoor fixtures you cannot move.
- Scrub the surface. Use a soft brush and mild soap to lift chalk and salt crust.
- Patch damage first. Fill cracks and gaps in stucco or trim before coating.
- Let it dry fully. Wait for a dry surface, ideally 24 hours after washing.
Step 2: Rinse and Remove Salt Residue
Rinse from the top down with fresh water, twice. The first pass loosens salt crust; the second carries residue to the ground so it does not dry back onto the wall.
Step 3: Apply a Protective Coating or Sealant
A protective coating or sealant is the barrier that keeps salt-laden air off the surface. Once the wall is clean and dry, apply a corrosion inhibitor or preventative coating made for your siding type. This step turns a cleaning routine into real corrosion prevention.
Choosing the Right Corrosion Inhibitor for Each Material
Material-specific protocols matter here, because the wrong product can damage the surface it is meant to protect. The protocols below separate metal, vinyl, stucco, and wood, since prep, product, and failure mode differ for each.
| Material | Best Protection | Why It Works |
|---|---|---|
| Metal | Rust-inhibiting primer plus topcoat | Blocks moisture from the metal substrate |
| Vinyl | Acrylic-based sealant | Adds a protective finish without harming panels |
| Stucco | Breathable masonry sealer | Repels salt while letting the wall dry |
| Wood trim | Oil-based primer plus exterior paint | Seals grain and resists salt uptake |
Metal Siding Protocol
- Prep: Wash with mild soap and fresh water, rinse twice, and let dry 24 hours. Feather rust spots with a wire brush or sanding block, then wipe dust away.
- Prime bare spots: Apply a rust-inhibiting primer to exposed metal, including fastener heads and scratches. Let it cure per the label.
- Coat: Apply a topcoat made for metal. Two thin coats outperform one thick coat, which traps solvent and can blister.
- Recheck fasteners: Replace any rusted fastener with stainless steel or a coated fastener before the topcoat goes on.
Failure mode to watch: Coating over active rust. The rust keeps expanding under the film and lifts the paint from below within a season.
Vinyl Siding Protocol
- Prep: Wash with mild soap and fresh water only. Avoid abrasive pads or solvents, which dull the surface and can cause vinyl siding degradation.
- Rinse: Rinse top-down with fresh water and let dry fully. Vinyl holds water in the lap joints longer than it looks.
- Seal: Apply an acrylic-based sealant made for vinyl. Work in small sections and keep the coat thin and even.
- Avoid: Oil-based paints and solvent-heavy products, which can warp panels and cause the finish to flake.
Failure mode to watch: Sealing a chalky panel. If the surface still rubs off on your hand after washing, the sealant will not bond and will peel in sheets.
Stucco Protocol
- Prep: Wash with mild soap and fresh water, then rinse twice. Patch cracks or gaps with a matching stucco patch and let it cure fully.
- Dry: Wait for a fully dry surface, ideally several dry days after patching, not just 24 hours.
- Seal: Apply a breathable masonry sealer. Breathability matters more than water repellency here, because stucco that cannot dry from the inside will spall.
- Reapply: Refresh on your coast-proximity tier schedule, typically every 2-3 years in the trace zone and annually in the direct spray zone.
Failure mode to watch: A film-forming sealer that traps moisture. It looks fine for a season, then the surface starts to blister and flake.
Wood Trim Protocol
- Prep: Wash, rinse, and let dry. Sand any rough or peeling areas back to sound wood.
- Prime: Apply an oil-based primer to bare wood, paying attention to end grain, which wicks moisture fastest.
- Paint: Apply two coats of exterior paint, letting each dry per the label.
- Re-caulk: Refresh caulk lines around trim, windows, and fixtures before the final coat.
Failure mode to watch: Painting over damp or resinous wood. The paint fails at the grain and lets salt water into the end grain.
Choosing a Product Without Getting Sold
Match the product to the material first, then to the exposure level. A coating rated for inland use may not hold up in the direct spray zone, and a heavy marine coating may be overkill five miles inland. Look for products labeled for exterior use and your specific substrate, and test any new product on a hidden panel first.
Step 4: Protect Exterior Hardware and Fasteners
Exterior hardware and fasteners fail first, and they fail quietly. Nails, screws, hinges, and light fixtures sit in the path of salt spray and hold moisture against the wall, rusting and staining the siding below.
What to do:
- Swap steel for corrosion-resistant materials. Stainless steel or coated fasteners last far longer near the coast.
- Coat exposed heads. A dab of rust-inhibiting paint on each fastener head slows rust mitigation failure.
- Check for galvanic corrosion. Where two different metals touch, corrosion speeds up. Use matching metals or an insulating washer.
- Re-seal around fixtures. Caulk gaps where lights and outlets meet the wall.
Step 5: Inspect and Maintain Your Siding Year-Round
Inspection keeps small problems from becoming surface restoration projects. Walk your exterior monthly and after every storm, looking for new rust spots, fresh salt crust, chalking paint, and loose fasteners.
Use this visual inspection checklist:
- Check lower panels for salt crust and chalky film
- Look under fixtures and hinges for rust streaks
- Test paint by rubbing a small area with a cloth
- Feel for soft or bubbling spots on wood trim
- Check caulk lines for cracks or gaps
- Confirm the last coating is still intact
- Re-rinse any wall that shows fresh salt residue
Frequently Asked Questions
How to stop salt corrosion on exterior siding?
Start by rinsing your siding with fresh water every four to six weeks to remove salt residue before it bonds to the surface. Apply a corrosion-resistant primer and exterior paint formulated for coastal environments. For metal components, use a corrosion inhibitor spray on fasteners and hardware. Keep up with inspections after storms, since salt spray can travel miles inland and settle on surfaces you may not think to check, including soffits and trim.
How often should you wash siding to prevent salt buildup?
In coastal areas, wash your siding every four to six weeks during the warmer months and after any major storm. If you live within a mile of the water, monthly rinsing is safer. Vinyl and metal siding benefit most from frequent freshwater rinsing because salt accumulates quickly in salt-laden air. A simple garden hose rinse works between deeper cleanings with a mild cleaning solution.
Does salt air damage vinyl siding or just metal?
Salt air damages both, but the mechanisms differ. Metal siding and fasteners face surface oxidation and galvanic corrosion, which leads to rust. Vinyl siding does not rust, but salt residue causes vinyl siding degradation by dulling the finish and trapping moisture against the surface. Over time, that trapped moisture can lead to warping, discoloration, and cracked panels if left untreated.
What are the best protective coatings for siding in salt air?
Look for exterior paints and primers labeled for coastal or marine environments. These products contain corrosion inhibitors and form a protective barrier against salt spray. For metal surfaces, an epoxy or polyurethane coating offers strong corrosion resistance. For vinyl, an acrylic exterior paint with UV protection helps prevent fading and surface oxidation. Always clean and dry the surface fully before applying any preventative coating.